A GPG (GNU Privacy Guard) key is a cryptographic tool that is used to ensure secure communication. It is part of the PGP (Pretty Good Privacy) protocol which utilizes a method of encryption known as public key cryptography. This method involves two keys: a public key to encrypt data, and a private key to decrypt it.
GitHub is a web-based platform that uses Git for version control. It’s predominantly used for computer code but can be used to manage any other types of files. It provides a distributed version control system for tracking changes in any set of files, as well as several collaboration features, such as bug tracking, task management, and wikis for every project.
In the context of GitHub, a GPG key is used to sign commits or tags. When you sign your GitHub commits using a GPG key, it allows others to verify that the changes come from a trusted source and that the code has not been tampered with since it was signed. This provides an additional layer of security and trust, especially important in open source projects where modifications come from many different contributors. Using a GPG key with GitHub provides credibility and ensures the integrity of your work, enhancing trust among collaborators.
- Downloading the Git BASH console
- Creating a GPG Key
- Listing your GPG Keys
- Formatting your Public Key for GitHub
- Adding the GPG Key to GitHub
- Signing your GitHub Commits
- Deleting a GPG Key
Downloading the Git BASH console:
This is the tool that we’ll be using to setup our GPG key. Git BASH is included with Git for Windows, which also comes with a few other utilities such as Git GUI and Git Credential Manager, you’ll find all of these to be useful but for this we’ll just be using the Git BASH console. You can accept all default settings during the setup.
Download – Git for Windows – https://gitforwindows.org/
Creating a GPG Key:
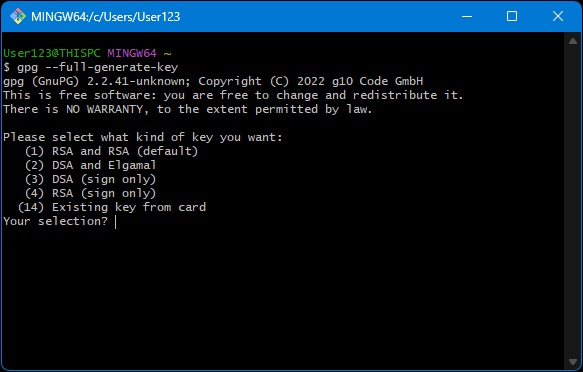
Now we’ll go ahead and create the GPG Key from the Git BASH console, run the following command:
gpg --full-generate-keyYou will then begin the process of receiving some prompts regarding the key’s configuration.

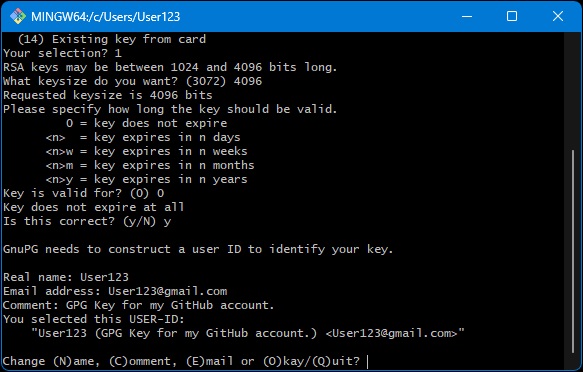
Create the key with the following:
- (1) RSA and RSA (default)
- 4096
- 0
As far as why we pick these settings, RSA offers enhanced compatibility and convenience as well as being employed for both signing/verification and encryption/decryption. This will help to avoid potential compatibility issues and simplify key management. RSA allows for up to 4096 bits of key size, further enhancing security. Setting the key as do not expire is more of a convenience decision, know that such as with passwords it’s a good idea to set expiration and keep track of your GPG keys.
The next set of prompts will be regarding identifying metadata of your GPG key. Know that while it may ask for personal details such as your real name, you may use an alias. This can be especially helpful in regards to keeping your information private, seeing as how all three of these fields will be publicly viewable. The comment field can be empty. Note, if using an alias email it will still need to be set as at least a secondary email attached to your GitHub account.
- Real name
- Email address
- Comment

Finally, it will prompt you for a passphrase. This is similar to a password for your GPG key.
Listing your GPG Keys:
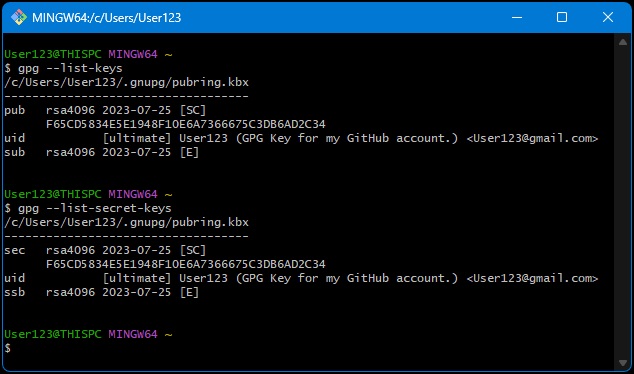
If you want to view the GPG keys saved to your local machine, run the following code. Note, you may see a similar result of both commands if the GPG Key was created from this machine and both keys exist on it.
Public Keys:
gpg --list-keysPrivate Keys:
gpg --list-secret-keys
Formatting Public Key for GitHub:
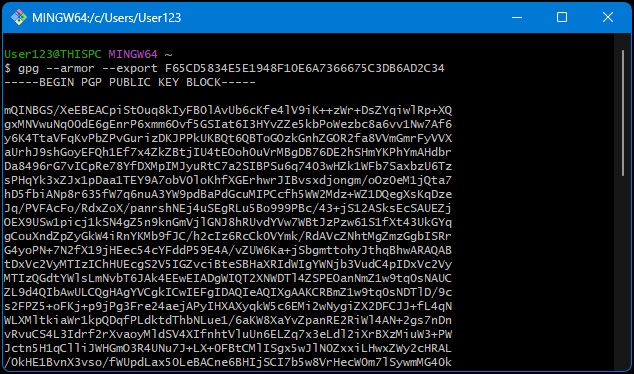
Now we need what is called the “ASCII-armored public key” in order to utilize it with GitHub. This is a specially formatted version of your public key created in a widely compatible text format.
ASCII-armored Public Key:
gpg --armor --export YOURKEYIDHERE
Adding the GPG Key to GitHub:
The printout from your ASCII-armored Public Key needs to be imported into your GitHub account now. Log into GitHub and go to your Settings menu. From there look under the Access section for “SSH and GPG keys”. Go to this page and select “New GPG key”. Set the Title as some kind of identifier for either the purpose of the key, machine name, or whatever you feel appropriate to help you understand which one it is.
Now in the Key field, paste everything from your ASCII-armored Public Key:
Make sure to include the beginning:
-----BEGIN PGP PUBLIC KEY BLOCK-----
And the ending:
-----END PGP PUBLIC KEY BLOCK-----Once you’ve added the key it should be displayed in your settings:

Note, you may need to verify the email address attached to the key and your GitHub account before it shows.
Signing your GitHub Commits:
Now we need to let Git on our local machine know which key to sign with:
git config --global user.signingkey YOURKEYIDHERENow whenever you need sign your commits, you can add -S to sign:
git commit -S -m "Your commit message goes here"
If you want to set the signing to happen by default without the -S:
git config --global commit.gpgsign trueBut some may still prefer to explicitly add the -S, do it however you prefer.
Once you’ve pushed the signed commit, you’ll see the Verified chip in the commit history.

Deleting a GPG Key:
In order to delete a GPG key from your local machine, run the following:
Starting with the Private Key:
gpg --delete-secret-key YOURKEYIDAnd finally the Public Key:
gpg --delete-key YOURKEYIDThen make sure to also remove it from your GitHub account. You can do this from the same page where you added it under Settings, Access, and then the “SSH and GPG keys” page.
Conclusion:
The provided information primarily encapsulates the fundamental utility of utilizing GPG Keys with GitHub. However, it’s advisable to delve deeper into the topic, given that committing signed changes and understanding the broader scope of security in the development domain are both paramount subjects. By now, you should have attained a more profound comprehension of the concepts such as GPG, GitHub, and the process of signing. This enhanced knowledge should empower you to put these concepts to practical and effective use.


